Это старая версия документа!
DIY The DMX-512 signal receiver
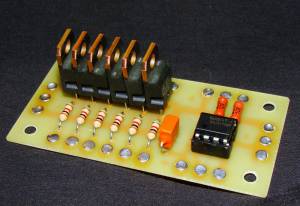
The DMX receiver is designed to receive control signals in the DMX512 standard and transfer them to the Arduino microcontroller input. On the same board, six load control keys are mounted.
The keys are controlled by the outputs of the microcontroller Arduino with pulse width modulation (PWM), the load is the LED lights or LED strip.
Specifications
- Number of control channels - 6
- Standard input signal - DMX512 (RS485)
- Load voltage - up to 50 volts direct current
- Load current - up to 0.5 amps per channel
- Dimensions - 70×35 mm
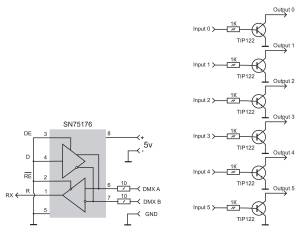
Schematic diagram
The control signal from the DMX connector is fed to the SN75176 buffer chip, and from it to the RX input of the Arduino microcontroller. After processing and decoding the signal (if the address transmitted via the bus corresponds to the preset address of the microcontroller) signals from the outputs of the microcontroller are fed to the transistor keys.
The keys, in turn, control the brightness of the corresponding LED fixtures. If necessary, you can change the program of the microcontroller so that the DMX signal controls the keys in binary mode (on/off). It should be ensured that the current through each transistor does not exceed 0.5 amperes or set the output Transistors for radiators.
Parts List
Buy components can be on Aliexpress
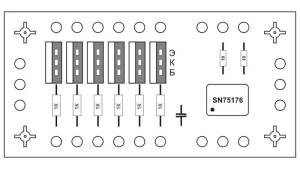
- Microcircuit SN75176 - 3$ , 10 pieces of the lot. (Analog (MAX485) 2$.) * Transistor TIP122 (TIP120) -10 pcs.
- Resistor 1 kΩ 0,125 W - 6 pcs.
- Resistor 10 Ohm 0.25 W - 2 pieces
- Socket for DIP-8 chip ** - pack 50pcs.
- Ceramic capacitor 0.1 μF - 1 piece
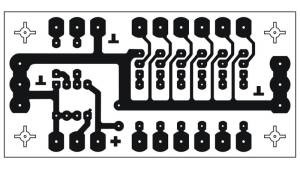
The printed circuit board can be download here


